Panoramic Pictures - How do I make my panoramics?
![]()
- Step 1 - Take and input the pictures
- I take my miniature tripod and attach it to the bottom of the camera. Then, I take a picture, rotate the camera a little, repeat until desired length has been reached. Then, I take the camera and attach it to my computer using an Input/Output cord. I then download the pictures from the camera on to my hard drive.
My Digital Camera - Olympus D-200L
- I then check the photos to make sure the lighting and position is what I wanted, and attempt to adjust the photos to a consistent level. After that, I load the pictures into a special program that aligns and stiches the images. The seams are eliminated by phasing from one photo to another gradually.
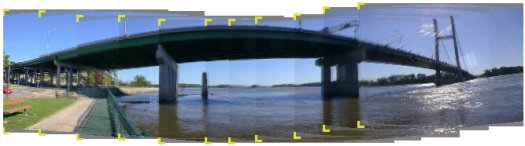
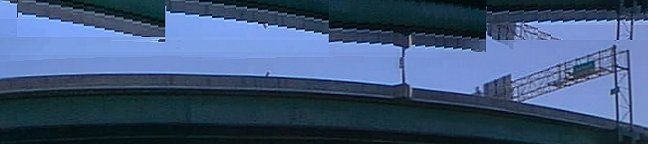
Stiching the Pictures
Intial Output
- Step 3 - Retouch and repair the stiched image
- In certain areas of the top or bottom of the panoramic image, there is no data to transition to the next picture, so bands of darker or lighter area appear in those places. In order to fix this, I clone other areas or textures into that area. When taking the picture, the camera usually moves up or down a small amount. Over space, this error is expanded, and when stiched with other images, it causes a lot of problems. When there a picture in the series doesn't have a section that others have because of an upward movement, the program tries to fill it in. It does this by reflecting the space above the missing portion onto that area. This isn't usually the best solution, and retouching the photo takes 1-2 hours per photo to make it look realistic.
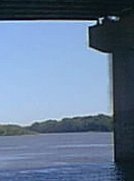
- Problems
- Reflected spaces

- Mismatching color bands
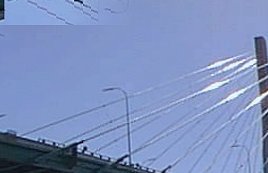
- Reflection to fill in spaces
- Misaligning and color bands
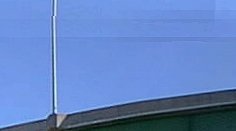
- Misalignment
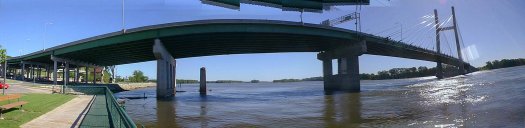
- Step 4 - The final product
- After the retouching, softening of the sky or edges due to JPEG compression may be necessary to increase the quality. The final files are saved as uncompressed TIFFs.
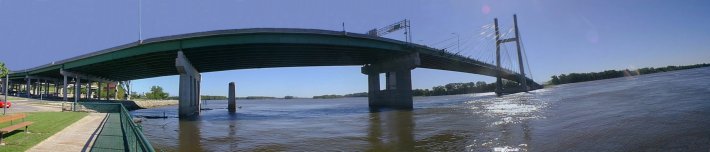
The Final Product
The End
- Panoramics from Chicago, Illinois
- Panoramics from Nauvoo, Illinois
- Panoramics from Burlington, Iowa
- Panoramics from KU
- A new panoramic based upon one made in 1907
- Panoramics from Omaha, Nebraska
- Panoramics from Creighton University
Back